How to Integrate DocuSign with KTern.AI ?
Prerequisites :
Before proceeding with this guide, ensure that you have a DocuSign developer account. You can acquire one by visiting the following URL: https://developers.docusign.com/
For the most up-to-date API pricing, please refer to this page: https://ecom.docusign.com/en-GB/plans-and-pricing/developer
Once logged in, hover over your profile and select "My Apps & Keys".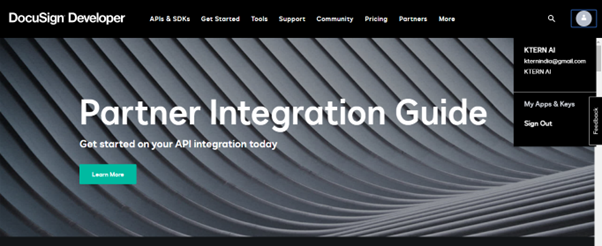
DocuSign Configuration Steps :
1) Visit DocuSign Developer Portal and log in with your DocuSign credentials.Once logged in, hover over your profile and select "My Apps & Keys".
2) Create an app by providing the required details and copy the Integration Key.

Note : You can give any name for App Name as per your preference
Scroll down and select the options as shown in the below image.
Scroll down and click on "Generate RSA" to acquire your RSA public and private keys. Ensure to store them securely, as these keys will be required during the integration with KTERN.
Under the Additional Settings , Add the following URIs in Redirect URIs field.

Note: Ensure there are no spelling mistakes or additional blank spaces in the copied Redirect URI.
Now copy your UserID, API Account ID, and Integration Key. Ensure to store them securely, as these values will be required during the integration with KTERN.
KTern Configuration Steps:
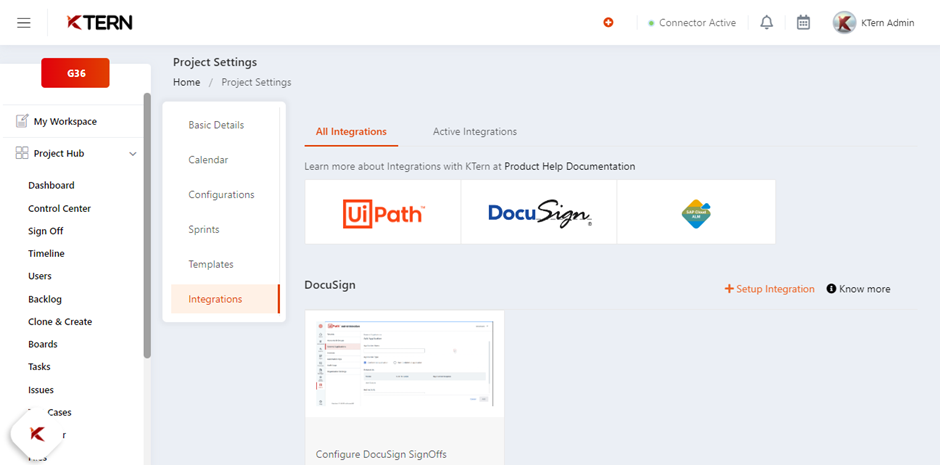
1) Log in to the KTERN app using your KTERN credentials and navigate to the specific project where you want to integrate DocuSign. Navigate to project settings page by clicking on the profile.
2) Under Integrations tab, click on DocuSign Banner > Click Setup Integration.
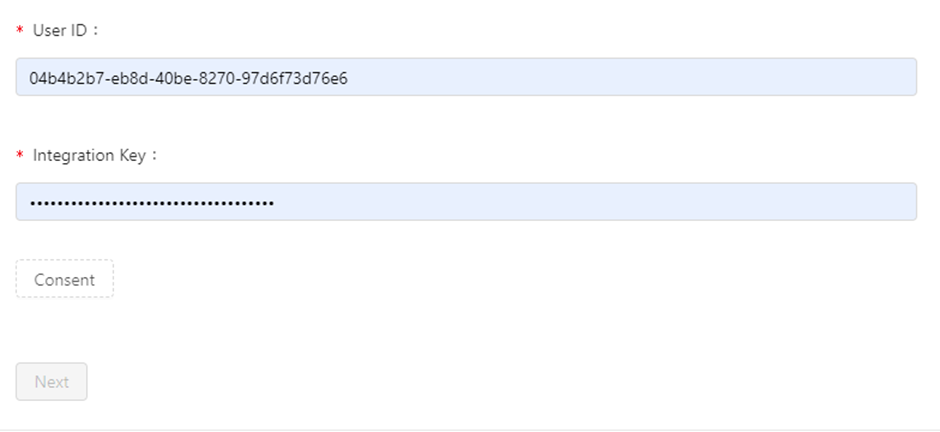
3) Fill in the required credentials (obtained from the previous DocuSign step) and provide consent by clicking on the consent button.
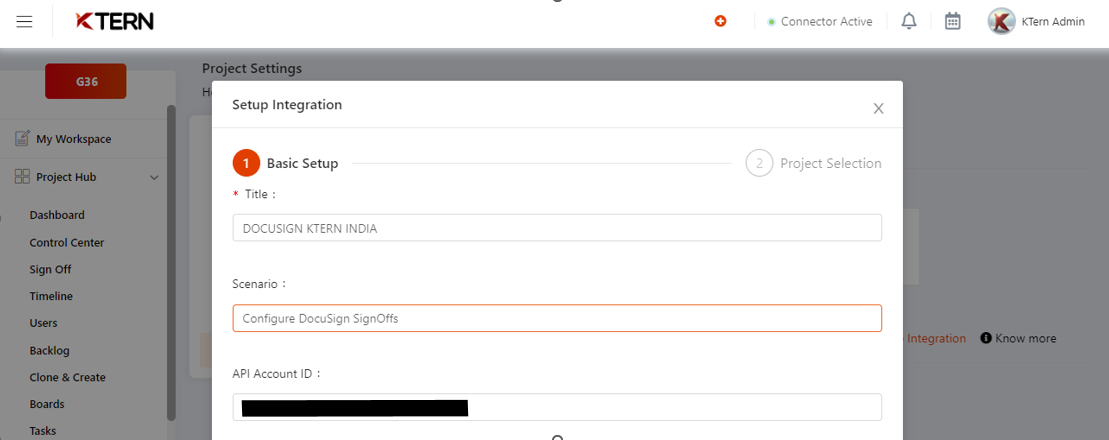
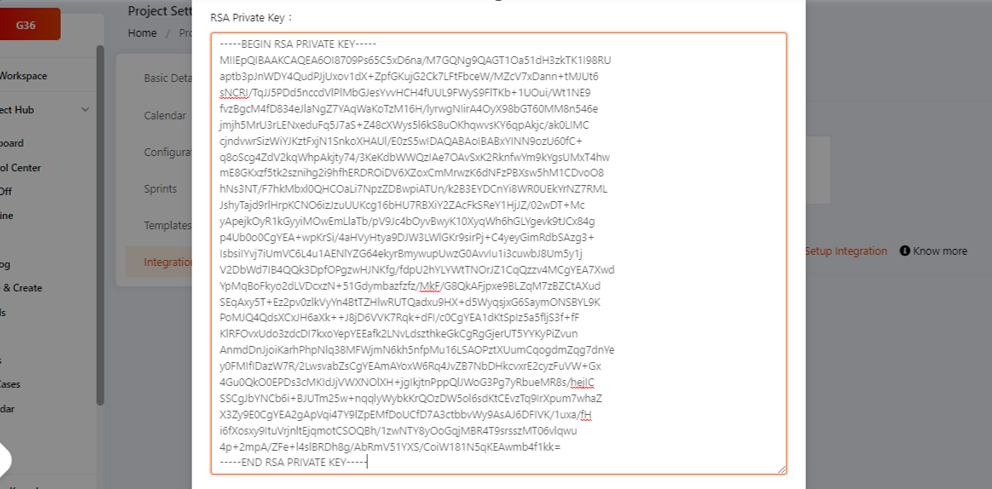
Also fill the UserID and Integration Key obtained from previous step.
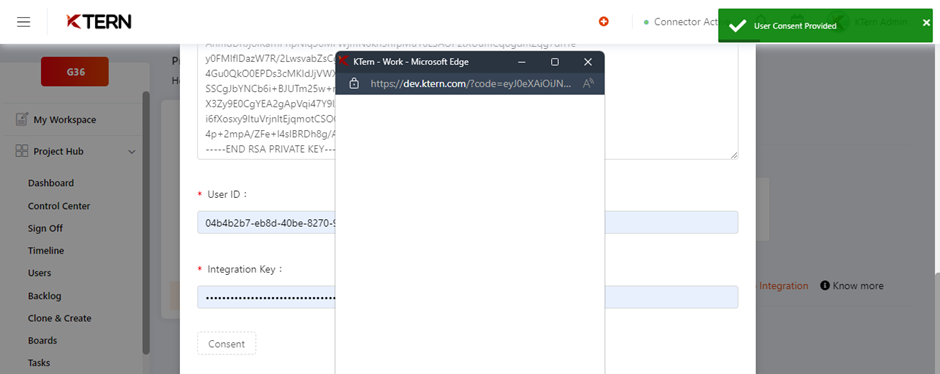
4) After clicking on Consent, a popup will appear, prompting your consent. Click on "Allow Access" (Login into DocuSign might be required in this step.)
5) Then Click on Next > Select DocuSign Default Project from drop down > Setup Integration.
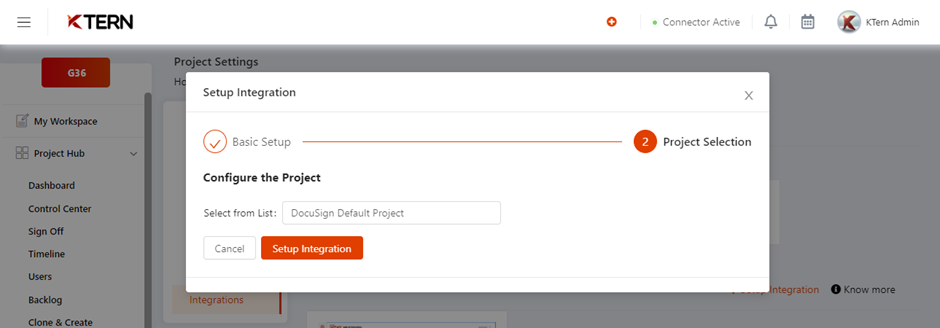
6) That’s it. Now you configured DocuSign with KTERN successfully. You can Check/Update the Credentials later by visiting the Active Integrations Tab.

Hereafter, whenever you create signoffs via KTERN, The DocuSign mail will be triggered along with the mail. (For DocuSign Mail to Trigger, you must add the attachments while creating the Signoffs).
Also fill the UserID and Integration Key obtained from previous step.
4) After clicking on Consent, a popup will appear, prompting your consent. Click on "Allow Access" (Login into DocuSign might be required in this step.)
5) Then Click on Next > Select DocuSign Default Project from drop down > Setup Integration.
6) That’s it. Now you configured DocuSign with KTERN successfully. You can Check/Update the Credentials later by visiting the Active Integrations Tab.
Hereafter, whenever you create signoffs via KTERN, The DocuSign mail will be triggered along with the mail. (For DocuSign Mail to Trigger, you must add the attachments while creating the Signoffs).
You can
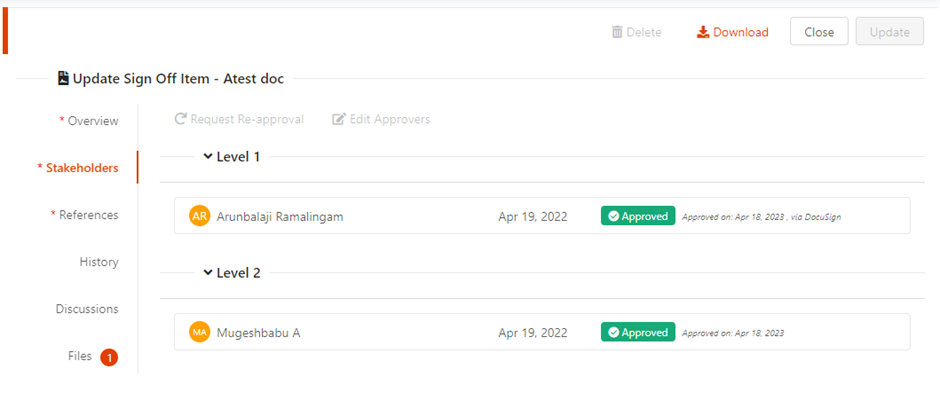
check the approvers signed via DocuSign in Signoff Details Tab like above.
You would also see the discussion comment like above whenever users
approved Signoffs via DocuSign.
Related Articles
In signoffs, how can custom filters be added, and how do you remove custom filters that are not required?
The filter for signoffs is available in the List View. Here, the user should apply the necessary filters and check whether the exact data is displayed as expected. Afterward, click on the filter icon, give a name to the filter, and click the "Add New ...How to Create Custom Boards, Create Tasks, and Manage Tasks in Custom Boards ?
Custom Boards Custom Boards in KTern empower you to create personalized boards that are fully tailored to your unique project or business needs. These boards enable seamless tracking of tasks, issues, and tickets with unlimited customization options ...How to Clone and Create Signoffs in KTern?
The "Clone and Create" feature in KTern helps reduce time by streamlining the creation of signoffs, ensuring unique signoffs are created while linking the Project Plan and GSI (Global Scope Items). This structured method ensures smooth signoff ...How to manage your Sign-offs with filters ?
Below are some icons that can be beneficial: (1) & (2) - These are the types of views namely List view and Explorer view. (3) - Quick Filters: Quick filter options are available at the top left corner of the Signoff header. You can easily filter ...How to Clone and Create Test Cases in KTern?
The main use of “Clone and Create” is to create "test cases" by linking the project plan and GSI (Global Scope Items). This helps reduce the time spent on creating test cases with redundant names for each task. This feature allows you to create test ...